Wednesday, November 23, 2011

Annual Print Sale and Show at Fort Mason

It's that time of year again! The annual Fort Mason Holiday Art Show and Sale is coming up on December 2-4, and the Printmaking department will once again have hundreds of prints available to view and purchase from students and faculty of CCSF. 

The opening reception is Friday night, from 6pm to 9pm, and the show and sale continues through Saturday and Sunday, from 11am to 5pm.


I will have several prints available, including:


As always, I'm really looking forward to the show. It's a great way to pick up original art for reasonable prices, and with the holidays just around the corner there's the chance to find a really unique gift or two.


Hope you can make it!

Sunday, October 9, 2011

New Work In Progress: The Jag

So, it's been a while since I had something new to post - partly due to summer break from CCSF and partly due to working on the edition of the Alpha Son print, now available in my Etsy shop (!)

Now that that is wrapped up, I'm on to the next project. This one will add a third plate to the layered linocut technique. An early proof that was created as part of the offset transfer to the third plate is here:


It shows two of the plates, not fully inked and also not fully cut, but it gives the idea. Colors are yet to be tweaked. Here's a close-up:


And here's the source: a beautiful 1955 Jaguar XK. Challenging to do it justice...


Saturday, May 14, 2011

In the studio: Alpha Son color plate


After proofing the key black plate for "Alpha Son", I transferred the image to another plat and cut away the second colored plate. I remembered to bring my camera into the studio today to capture the work in process in a studio environment.


Both plate on an inking surface, with colors rolled out

I had visions of using the bold colors of some of the original cars I drew from in my second colored plate. Given the  bold outlines for each car, I had the option of inking individual cars with unique colors, almost like an a la poupee inking in etching.

After printing the colored plat with selective areas printed; inked black plate in place, ready to print

As I proofed in red with transparent blue and orange with transparent green. there were parts that I liked, but wasn't satisfied by the composition as a whole.


After printing the black plate over the multi-colored printed colored plate


Finally, I tried proofing with an opaque cream on the second plate. 


After printing the colored plate inked in opaque cream

I liked bringing the unity of a single color across all the subjects, but keeping the color impact subtle, to enjoy the strong black and white composition of the key black plate.


Cream printed proof on the drying rack


It's always a journey, but I think we are now approaching the edition proof!

Sunday, April 17, 2011

Fun, at home print project

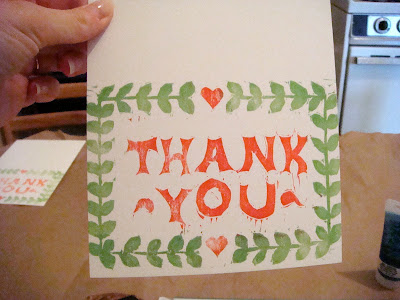
I really wanted to put my printing skills to work for the wedding and besides our little logo, my big project was making the Thank You cards. I decided to try carving rubber instead of linoleum, which I'd heard was easier. Um, it's like carving room temperature butter... which is a little too easy when you're used to linoleum.


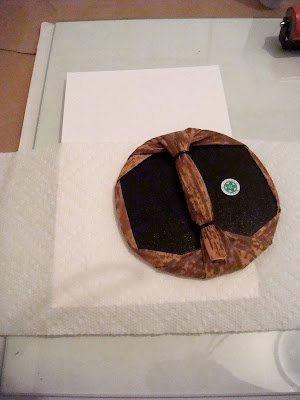
I used some grocery bags to ensure a non-oily surface and protect my kitchen table. Tools include rollers, ink, burin, glass slab surface, paper towels, and palette knives


 I bought some water based inks to use at home, since I'd prefer to keep things non-toxic if it's close to where I cook (okay, exactly where I cook). I found that the water-based inks dry fairly quickly, so I needed to ad fresh ink after ever couple cards.


Inking two colors took some careful application...


To keep things simple, I inked a single plate with two colors, since I two-plate registration was going to be a problem at home (actually, it's quite possible, but this was also faster when printing in the volumes I needed).


I found that using a paper towel allowed the burin to slide easily and not catch on the paper 


The obvious barrier to printing at home is having (or, rather, not having) a press. However, a classmate of mine informed me that traditional Japanese woodblock printing was never done with a press, but rather rubbing a burin. Although I never bothered to verify this factoid, the thought nonetheless encouraged me to try the burin method.


Ta-da!


The end result was not a totally even print, but given the, ahem, rustic looking print, the textured inking seemed fitting.


And so, many cards were made. Now that my forearm has recovered, I'd like to try a new project...

Saturday, April 16, 2011

Working Title: Alpha Son

So, it's been a while since I last posted - I was working on printing full editions of the Mont Saint Michel print and then went back to do an edition of the much enjoyed Lobster Pot print (will be working to get those on the Etsy store soon!). Then I started a couple new linocuts, one of which is quite large, so that took a while. The dimensions are the same as the Zero Sum Game, but I'm planning to develop it into a two-plate linocut that could be made into a book, but would also look nice as a poster.

As for content, I am continuing to explore automotive muses, thanks to my husband. I took several photos at a vintage car driving event and assembled a collage to use as a reference source:


Here's an early proof of the key plate, working title, Alpha Son:

Monday, March 7, 2011

Shout out: Anna Denise of The Yellow Umbrella

Some of you may have noticed a small links section on the right-hand side of this here blog, including a link to The Yellow Umbrella. The woman behind the blog is the talented and uplifting Anna Denise, who I met years ago when visiting friends studying in the Netherlands. She's always been super supportive of my work, using her internet savvy to track down my earliest forays into showing my art online*.


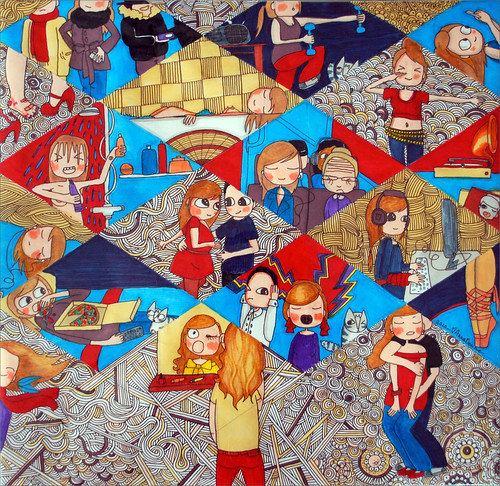
Wallpaper Exhibition Piece
Barcelona "Wallpaper" by Anna Denise

Well, this month, Anna's work is getting some spotlight as the featured artist on Etsy's Twitter page! With that cause for celebration, I thought I'd give her a well-deserved shout out :) (I didn't want to spoil the surprise of what her featured design is so click through!)

*Appropriately, in an interview on the Etsy blog as part of this project, Anna expounds beautifully on the challenge to balance seeking exposure and finding your "voice" as a young artist.

Tuesday, March 1, 2011

Shows!

Shame on me for not getting a post up in time for the opening of "RED" at Bar Basic, where I have two prints on display. Fortunately, the show will be up through April and bar has a great happy hour and frequent visits from food trucks, like TaKorea, so stopping by to check out the show should fit easily into your social calendar :)


But now I just found out that I have a piece showing at MKSF Gallery this Saturday, March 5 from 7pm to 10pm! MKSF Gallery operates in the studio of Mike Kimball, so it will not be open to the public outside of the opening. The event also coincides with two photography exhibits at Arc Studios: "FOTO: Pushing Boundaries" and "BAPC: Cultivating Photography"

1246 Folsom St., Studio 202
San Francisco, CA 94103

Saturday, January 8, 2011

"Zero Sum Game" Book, final

This book project started a couple years ago now and required me to delve into some new topics, like bookbinding, in order to complete my vision. Of course, other projects came up and I'm only now finishing the first set of books (a prototype was completed in September).


See earlier coverage of printing and assembling the core parts of the book here and here.


For the final stages, I carved and printed a cover with a title (inspired by learning about game theory in my micro-economics class taken in my semester off from print making) and solid black back. Unlike the soft cover on the Belize book, this cover and backing were separate and would leave the binding area exposed. 


First, gluing inside the front cover...

Once the cover (image side) is affixed, gluing the inside flap...
Once the front and back covers were glued on and dried under a heavy book, I bound the books with black thread, much like standard signature binding, or decorative longstitch (minus the soft cover to stitch through).


Treating each inside page fold as a signature, using a template and heavy duty paper awl to create six holes...

Leaving a tail to tie off in the first signature...

One of the reasons I wanted to leave the binding exposed was to show off the rhythmic stitching...

And repeat... and repeat...


Once I finish the set, I'll take some nicer photos and post one for sale on my Etsy shop!

Friday, January 7, 2011

Experimenting with Mont St Michel print

This is why I love printmaking: you can start with a core image, or component of an image, and experiment  in dozens of ways to find the complete look.


In November, I proofed the first plate of another two-plate linocut of Mont St. Michel. In December, I trialed a number of combinations with a second color, using a plexiglass monoprint plate to ink, etc.


Starting with a simple, solid roll-up..


Printing the ghost of the roll-up achieved a subtler color. In some ways, closer to what I envisioned...


While trying to find the right shade, I pulled out the color in the middle-ground...

Also tried printing color in only the sky...

Finally pulled out the carving tools and cut the second plate
Related Posts Plugin for WordPress, Blogger...